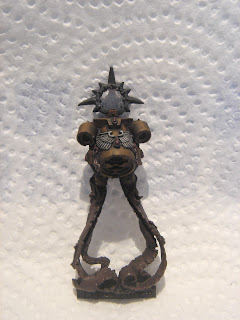
The Sanguinor, Exemplar of the Host
Well this is my first guide so I hope that I get a good layout and the images come through well. I spent about 2 days painting this guy on and off, overall Id say with preparation of the model, this model probably took me about 10 hours or so, maybe a little more maybe a little less. I hope you enjoy the guide, and if you have any comments or criticisms they are all appreciated.
Stage 1
Since metal models generally arrive pretty messy first tidy up the model, removing all mould lines and bumpy bits. Then spray paint black.
Stage 2
Basecoat the model. At this stage the sword and the gem on shoulder is left undone.
Gold armour and details = Scorched Brown
Shoulder pads, gems and sword handle = Mechrite red
Halo and small silver areas = 1:1 Codex grey : Chaos black
Wings = Codex grey
Wreaths on knees = Dark Angels green
Wings on body = Fortress grey
Scrolls =1:1 Scorched brown : Graveyard Earth
Stage 3
Next I did some washes.
The whole body and backpack was washed with Bedab black. once dried the shoulder pads where then washed with Baal red.
The wings were washed with asurmen blue, then a lighter wash of bedab black was applied to get into the recesses.
Stage 4
Now the basecoat and washes are done, I get the largest area of colour done first which is the gold.
Colours used = Scorched brown, Snakebite leather, Skull white.
First a coat of scorched brown lightened with some snakebite leather, probably a ratio of about 5:1.This covers all but the recesses.
The next coat covers even less of the armour, with a 1:1 ratio of snakebite and scorched brown.
Now the true highlights, now its a ratio of 3:1 in favour of snakebite leather., since this is a highlight it only goes on the brighter edges of the metals.
Following this is the most extreme highlight, this is a mix of skull white with a touch of snakebite leather, just to tone it down to be similar to the highlight below but still bright enough to stand out.
Stage 5
Skull white
Goblin green
1:1 Mechrite red : Blood red
feathered areas painted with the white, leaving the shaded bedab black in the recesses
Goblin green highlights the wreaths on the knees
The red is painted on all red areas, being careful on the shoulder pads to make sure it blends well.
Stage 6
Gems, shoulder pads, sword hilt = 1:1:1 Blazing orange:Blood red:Skull white
Silver areas = Codex grey
scrolls = Graveyard earth
For the reds if necessary you could add an intermediate layer of blood red and blazing orange before the highlight.
The Codex grey should colour all but the shaded areas of the soon to be silvers.
simply coat the scrolls in Graveyard earth leaving some of the underlying colour.
Stage 7
scrolls = 2:1 bleached bone : Graveyard earth
silver areas = Fortress grey
Gems/Vial = Skull white
For the scrolls add the mixture noted above leaving some of the previous layer still showing
The fortress grey acts as a highlight on the silver areas
the skull white highlight is very extreme and only points of colour or a light dash are used, just to give the look of a shine.
Stage 8
Skull white is used as a highlight on the silver ares such as the halo, while a 1:1 mix of skull white and bleached bone is painted onto the scrolls. Then used chaos black to add the text to the scrolls.
Shoulder Pad Gem = enchanted blue, chaos black, hawk turquoise, skull white.
First 3:1 mix enchanted blue:chaos black and coat the whole gem.
Add Hawk turqoise to that mix so it 1:1:1/3 enchanted blue:Hawk turquoise:chaos black and coat so it leaves some of the lower layer.
Then a pure layer of the Turquoise
Next use increased layers of white mixed with turquoise covering less of the gem
Finish off with an extreme highlight of white
Stage 9
Now the sword!
Hawk Turquoise
Chaos black
Skull white
First a basecoat of hawk turquoise with a touch of black.
Then pure hawk turquoise on the areas that are going to be lighter.
Next use a mix of hawk to white 2:1
Next add even more white and cover less of the lightened areas
Finally use an almost white layer with a touch of hawk, and do the most extreme highlight.
Stage 10
Now simply paint white onto the wings leaving the shadows and viola! Done!


Dear god man! This is better than the 'Eavy Metal version. Great NMM tutarial as well. I'll be using this as a guide for a few projects i have in mind. Cheers!
ReplyDeleteI'm really glad you like it, I really enjoyed painting this model and was very happy with how it came out.
ReplyDeleteThis article is going straight into my bookmarks for painting tutorials.
ReplyDeleteModel looks fantastic!
Really impressive work and a great tutorial, i'll certainly be trying it out on my own Sanguinor.
ReplyDelete